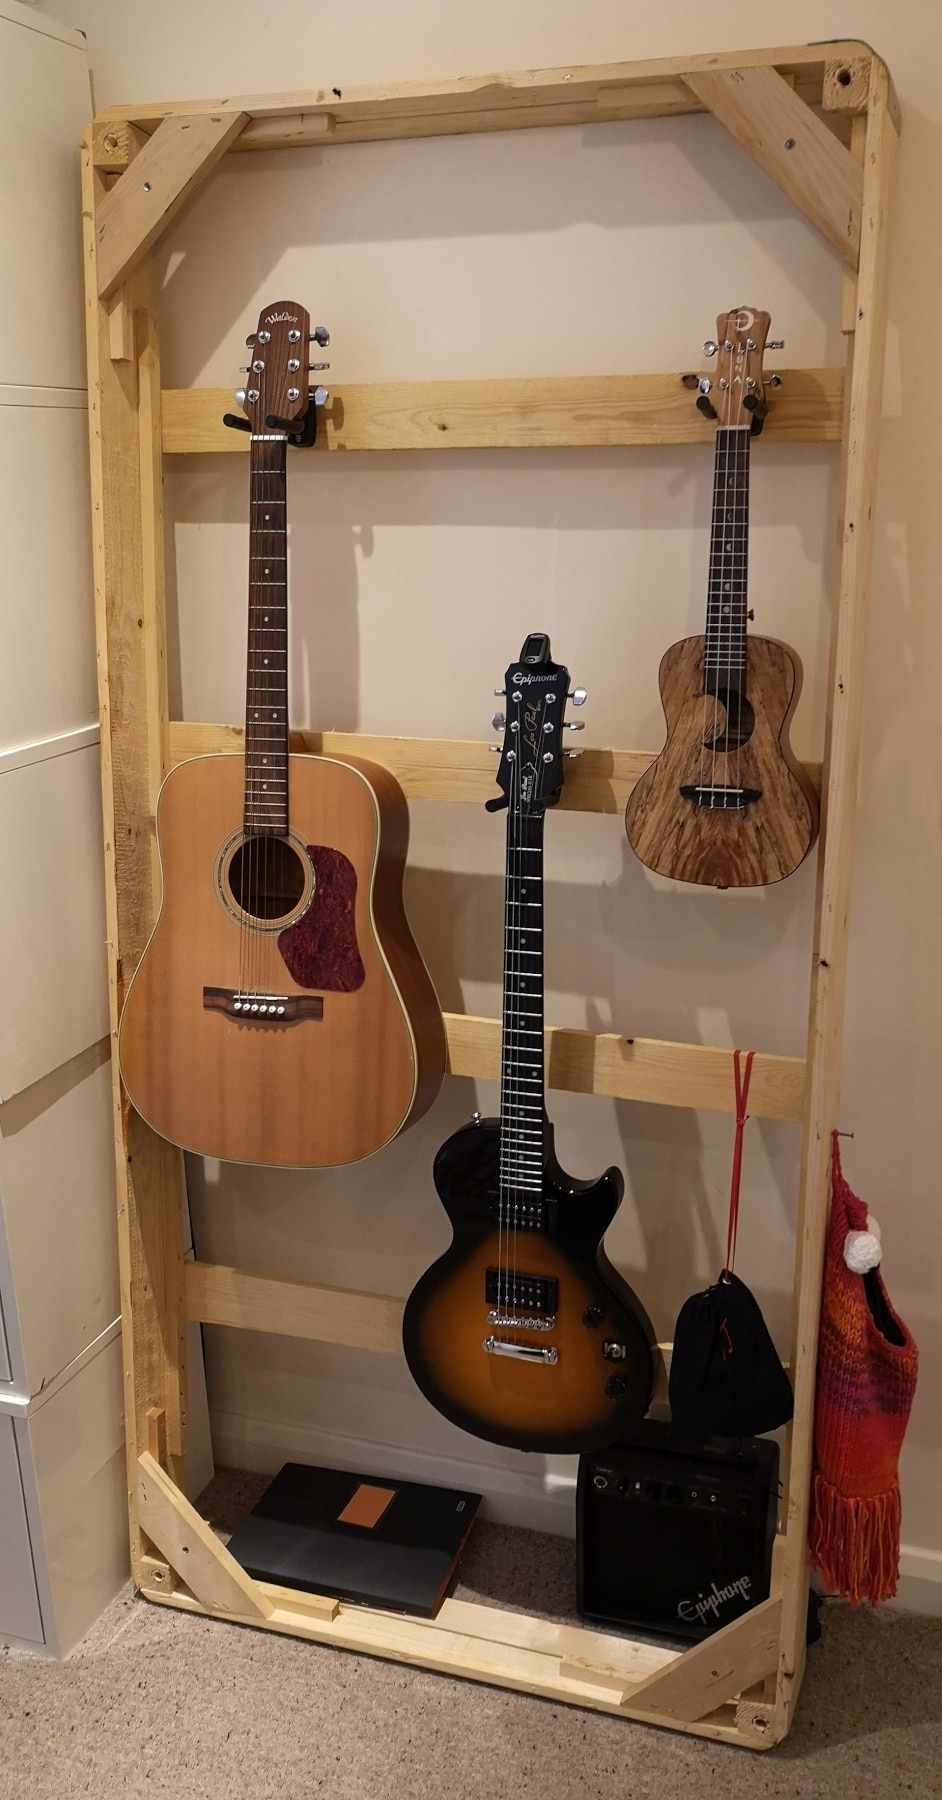
When life hands you lemons… make a Music Instrument Stand!?
What do you do with a broken bed base? Well you could break it down into movable parts and bin it OR maybe it can be reused as…a music instrument stand!!!
Living in a rental means drilling holes in the wall is a bit of a no-no. That said, leaving musical instruments propped up against the wall (or a chair or on the floor) makes me twitchy. Well serendipity stuck, a bed broke and it turns out that a bed base makes a pretty good instrument rack.
Instructions to make a music instrument stand from a bed base
Making this one is pretty straight forward (though watch out for splinters)
- Take your bed base and remove any fabric, padding or cardboard layers. To help with this you will likely need a screwdriver or leaver.
- Remove all sticking out staples. This was a cheap bed frame, it had A LOT of staples to be removed. Again a long screwdriver worked well for this, and for the more stubborn staples a long needle nosed pliers.
- Depending on how rough the wood is you may want to give the remaining wood a bit of a run over with a mouse sander. Again take care, watch out for any remaining staples as these may damage your sander (or you)
- You can buy instrument hooks online pretty cheaply. We got a set of 3 of the same type that are adjustable for ukuleles and guitars. Decide on where you are going to position these hooks on the rack and mark the spot. The last thing you want to do is guess and then find you have no space for your instruments.
- Mount the hooks to the slats using appropriate fixtures. In this case we used nuts and bolts for additional security.
- Prop the rack leaning back against the wall. If this is going on a slippery floor, a high traffic area, an earthquate prone area and/or you have kids you will absolutely need to give in and anchor this to the wall for safety.
